
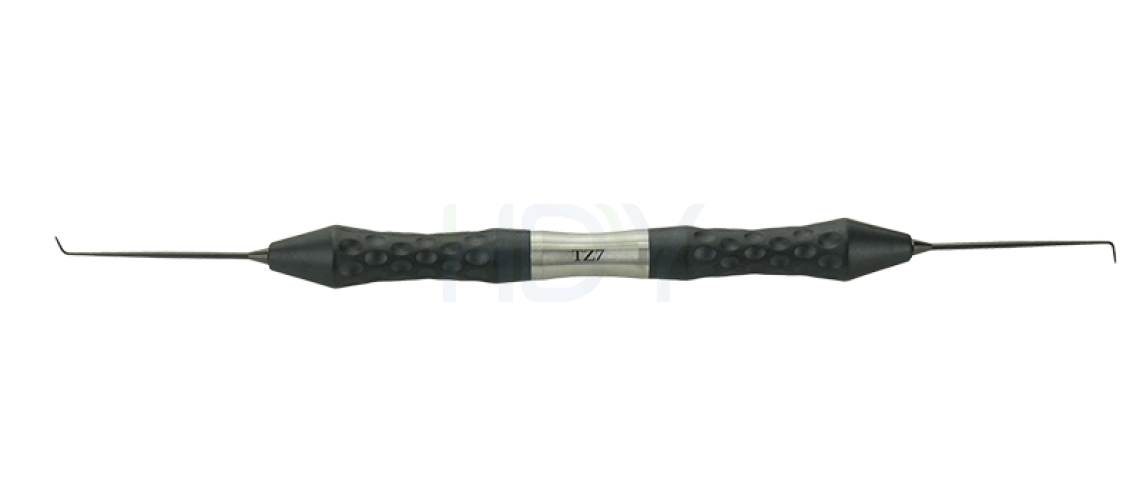

TZ7 vs. TZ8 Micro-Explorers for Microscopic Apicoectomy
Both instruments provide fine tactile exploration, but their clinical value depends on matching the working-end geometry to the tooth position, surgical path and method of visualization.
Request TZ7 & TZ8 PricingA dental operating microscope improves magnification and illumination, but it cannot provide tactile information. During root-end surgery, a clinician may see a line, margin or surface irregularity without knowing whether it represents a crack, calcified boundary, preparation edge or anatomical variation. A purpose-designed micro-explorer for apicoectomy converts the visual finding into controlled tactile feedback.
HDY Medical offers two complementary micro-explorers: the TZ7 for anterior access and the TZ8 for posterior access. This guide explains why both models belong in a comprehensive endodontic microsurgery set.
1. Why Apicoectomy Requires a Micro-Explorer
The Microscope Shows
Magnification and illumination reveal the resected root surface, cavity outline, fine lines and restricted anatomical areas.
The Explorer Confirms
A fine working tip helps the clinician trace boundaries, detect catches and assess surface or cavity irregularities.
Visual and tactile information should support each other. The operator first establishes a clear field, then introduces the explorer with light contact to investigate a specific target. Using an explorer without stable visualization increases the risk of contacting delicate periapical tissues or misinterpreting the anatomy.
2. Clinical Functions of a Micro-Explorer
An endodontic micro-explorer can support several stages of microscopic apicoectomy when handled gently and used within its intended inspection role.
Root-apex localization
The working tip helps trace the exposed root surface and confirm the target anatomy within the surgical field.
Crack and surface inspection
Fine tactile contact may help the operator examine visually suspicious lines or changes on the resected surface. Findings must always be interpreted in the broader clinical context.
Calcified tissue and anatomical boundaries
Subtle differences in surface texture and resistance can supplement microscopic observation when distinguishing calcified structures or anatomical transitions.
Retrograde cavity-margin inspection
After preparation, the explorer can trace the cavity margin and help identify irregularities before the filling stage begins.
3. HDY TZ7 Anterior Micro-Explorer

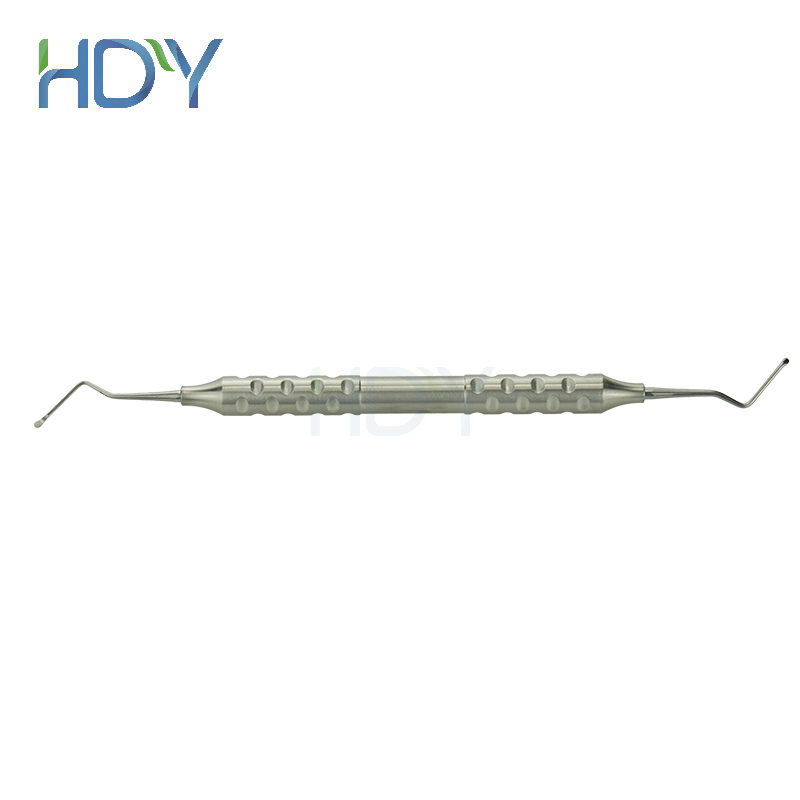
TZ7 Micro-Explorer, Anterior
TZ7 is designed around the more direct surgical access typically available in anterior apicoectomy. Its fine working tip supports inspection without introducing a bulky instrument into the magnified field.
Clinical advantages of TZ7
- Working-end orientation suited to anterior entry paths
- Direct manipulation with minimal obstruction of the microscopic view
- Fine tactile inspection of the resected surface and cavity margins
- Useful for anterior root-apex localization and boundary tracing
Recommended TZ7 sequence
- Establish clear direct or reflected visualization.
- Identify the exact surface or margin requiring inspection.
- Introduce the TZ7 working tip with light contact.
- Trace the target without levering or applying lateral force.
- Withdraw and reassess the finding under magnification.
4. HDY TZ8 Posterior Micro-Explorer

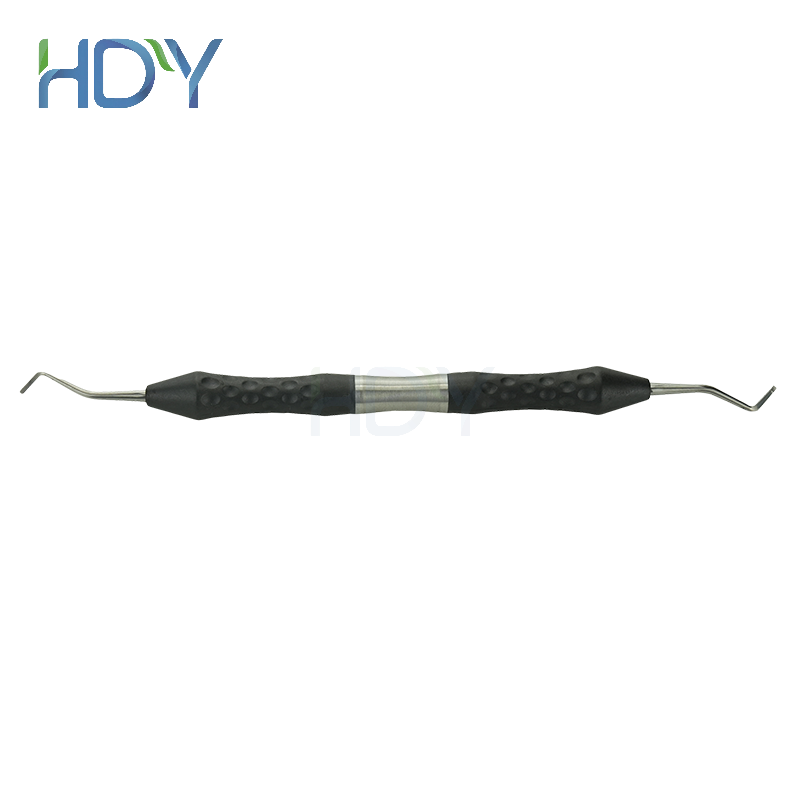
TZ8 Micro-Explorer, Posterior
TZ8 provides a posterior-oriented working-end configuration for sites where the entry path, cheek position, bone access and microscope angle may limit direct manipulation.
Clinical advantages of TZ8
- Purpose-oriented geometry for posterior surgical paths
- Better compatibility with restricted working spaces
- Designed to coordinate with reflected inspection
- Useful for posterior cavity margins and difficult-to-see surfaces
Recommended TZ8 sequence
- Position the patient and microscope for the best posterior access.
- Use the KX4 micro-mirror when direct vision is incomplete.
- Bring TZ8 into the reflected field slowly.
- Trace the posterior cavity or root-end margin with minimal pressure.
- Remove the instrument before changing the mirror angle.
5. TZ7 vs. TZ8 Comparison
| Comparison | TZ7 | TZ8 |
|---|---|---|
| Primary tooth position | Anterior teeth | Posterior teeth |
| Typical visualization | Mainly direct vision | Direct and reflected vision |
| Working-end orientation | Anterior entry path | Restricted posterior path |
| Primary clinical use | Root-apex and resected-surface inspection | Posterior cavity and margin inspection |
| Recommended set | Anterior surgery set | Posterior surgery set |
| Best complementary instrument | KX4 when reflection is needed | KX4 for restricted reflected access |
The distinction is not that one model is more precise than the other. Both are precision explorers. The difference lies in how their working-end orientation relates to the operative path.
6. Why One Explorer Cannot Cover Every Position
Anterior Surgical Path
- More direct line of access
- Greater opportunity for direct vision
- Straighter approach to the resected surface
- TZ7 geometry supports controlled entry
Posterior Surgical Path
- More restricted oral and bone access
- Greater dependence on mirror reflection
- Angled approach to posterior root surfaces
- TZ8 geometry supports restricted entry
Using an unsuitable working-end orientation can force the clinician to rotate the wrist, change the microscope position unnecessarily or bring the handle across the field of view. This can reduce tactile control even when the explorer tip itself is fine.
For clinicians performing both anterior and posterior apicoectomy, purchasing TZ7 and TZ8 together is more practical than treating either instrument as universal.
7. Using TZ7/TZ8 with the KX4 Micro-Mirror

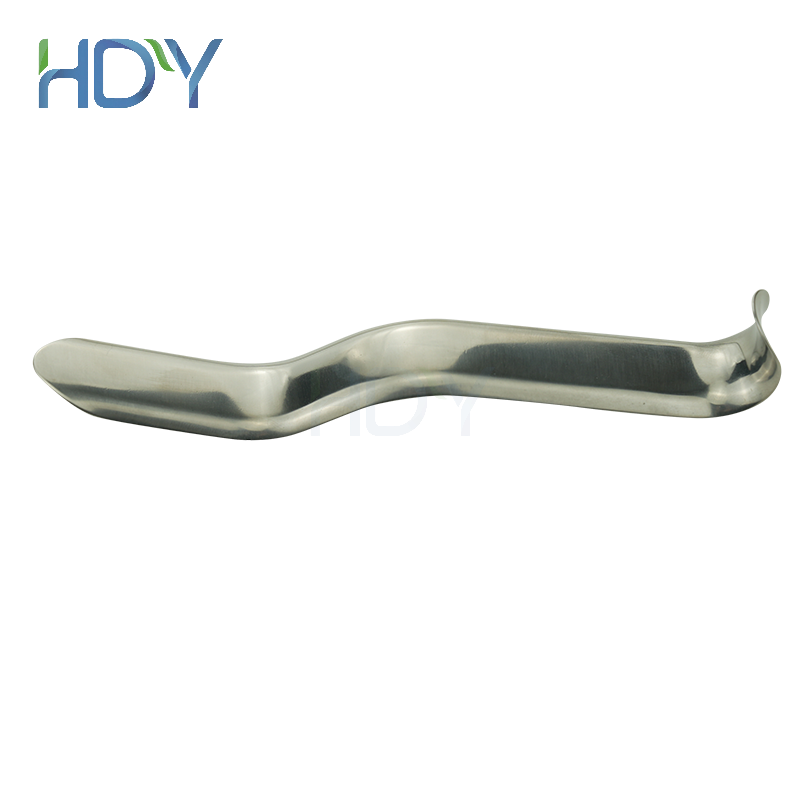
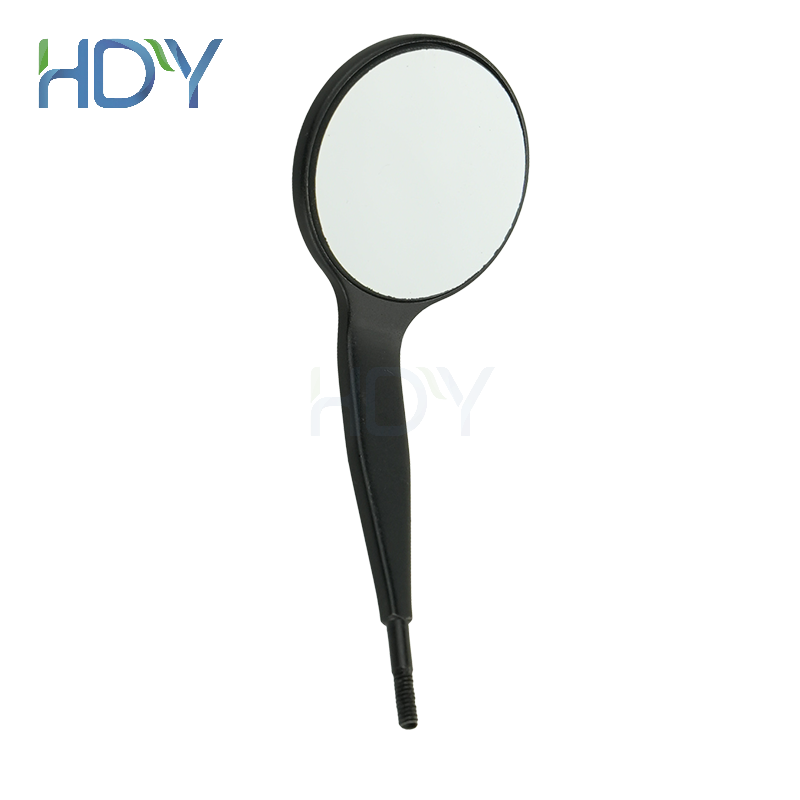
KX4 · 9 × 4 mm Reflected Observation
The compact HDY KX4 Micro-Mouth Mirror helps visualize dorsal, lateral and posterior structures that may not be aligned with direct vision.
Recommended mirror-and-explorer workflow
- Establish the view: adjust the patient, microscope and mirror until the target is clearly reflected.
- Stabilize the mirror: maintain the reflection angle without allowing the surface to contact or obscure the target.
- Introduce the explorer: bring TZ7 or TZ8 into the reflected field slowly.
- Trace gently: inspect the dorsal surface, lateral wall or cavity margin using light contact.
- Withdraw before repositioning: remove the explorer before changing the mirror angle.
8. Safe Clinical Handling
Micro-explorers are diagnostic and inspection instruments. Their fine tips are not designed to remove bone, enlarge a cavity, lever tissue or substitute for an ultrasonic preparation instrument.
Recommended Handling
- Use light, controlled contact
- Maintain direct or reflected visualization
- Trace only the intended surface
- Withdraw before repositioning the mirror
- Stop if the tip catches unexpectedly
Avoid These Actions
- Forceful lateral pressure
- Blind entry into the surgical field
- Levering periapical tissues
- Using the explorer as a preparation tip
- Attempting to straighten a damaged tip chairside
Excessive force may damage delicate periapical tissues or deform the explorer working end. A deformed micro-tip should be removed from clinical service and evaluated according to the clinic’s instrument policy.
9. Cleaning and Tip Protection
Fine explorer tips require immediate cleaning and protected handling throughout reprocessing.
- Remove biological residue promptly after the procedure.
- Do not allow blood or material residue to dry on the working end.
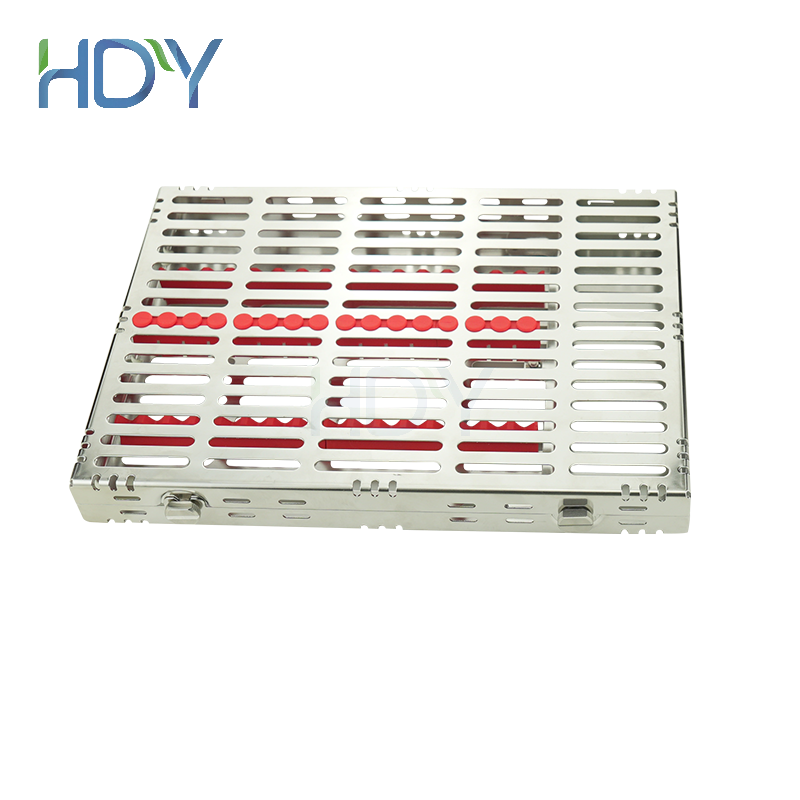
- Keep TZ7 and TZ8 fixed in an instrument cassette during transport and sterilization.
- Prevent contact between explorer tips and heavier instruments.
- Inspect the working end under magnification before sterilization and before clinical use.
- Follow applicable infection-control protocols and current product instructions.
Clinics can review the HDY dental cassette range when configuring a complete microsurgical set.
10. Buy TZ7 and TZ8 Directly from HDY
HDY Medical Technology (Guangzhou) Co., Ltd. manufactures professional dental, endodontic and microsurgical instruments. Endodontists and dental clinics can purchase TZ7 and TZ8 as individual instruments or include both models in a complete microscopic apicoectomy set.
A comprehensive set can combine:
- TZ7 Anterior Micro-Explorer
- TZ8 Posterior Micro-Explorer
- KX4 9 × 4 mm Micro-Mirror
- HDY CTG Micro-Condensers
- A compatible instrument cassette
Choose the Right HDY Micro-Explorer for Your Clinical Cases
For clinics treating both anterior and posterior teeth, request TZ7 and TZ8 together with the KX4 mirror. Contact HDY for product information, quantities and complete set pricing.
Request TZ7 & TZ8Frequently Asked Questions
What is the main difference between TZ7 and TZ8?
TZ7 is configured for anterior surgical access, while TZ8 is configured for restricted posterior access. Their difference is primarily working-end orientation and operative position.
Can TZ7 be used for posterior apicoectomy?
A clinician should select the instrument geometry that provides controlled access to the specific site. For routine posterior positioning, TZ8 is the purpose-oriented choice.
Why should a clinic purchase both explorers?
Clinics treating both anterior and posterior cases need different access paths. Keeping both models available prevents reliance on one working-end orientation for every position.
Can TZ7 and TZ8 be used with the KX4 mirror?
Yes. KX4 can provide reflected observation when direct vision is incomplete, particularly in restricted posterior and lateral areas.
Are micro-explorers used to prepare the retrograde cavity?
No. They are inspection instruments. Retrograde preparation requires appropriate ultrasonic equipment and preparation tips.

 English
  简体中文
简体中文  Español
  Deutsch
  Français